
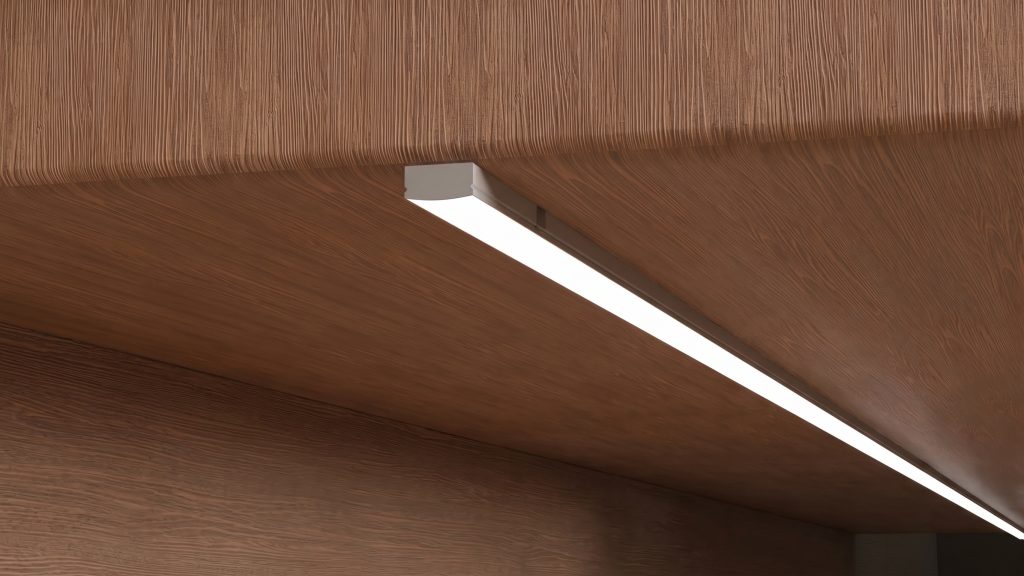
Selecting a recessed or surface-mount LED profile involves more than appearance. The mounting method affects substrate preparation, edge finishing, installation tolerances, maintenance access, and coordination with other building materials.
This guide outlines the key technical considerations that specifiers, installers, fabricators, and purchasing teams should evaluate when specifying LED aluminum profiles.
The appropriate profile depends on the substrate, installation method, required finish, and project conditions. Final selection should be verified against the relevant product drawings and installation requirements.
Recessed vs Surface-Mount LED Profiles: Quick Comparison
| Project condition | Recommended approach | Main consideration |
|---|---|---|
| Existing finished wall, cabinet, or ceiling | Surface-mount | Avoid cutting into finished materials |
| New cabinetry or custom millwork | Recessed or surface-mount | Decide based on the desired finish and available depth |
| Cabinet panels with exposed routed edges | Recessed, where suitable | Check whether the profile lip covers the opening |
| Tile installation planned in advance | Tile-compatible recessed profile | Match the profile to tile thickness and installation details |
| New drywall requiring a trimless finish | Plaster-in profile | Standard recessed profiles are not necessarily trimless |
| Retrofit installation with limited access | Surface-mount | Usually requires less substrate modification |
| Long, continuous linear lighting runs | Either | Plan straightness, profile joints, and diffuser alignment |
| Easy removal or relocation is important | Often surface-mount | Consider fixing methods and future access |
Use this comparison as a starting point. The actual profile dimensions, mounting method, and substrate condition determine whether a particular installation is suitable.
What Is the Difference Between Recessed and Surface-Mount LED Profiles?
Recessed LED profiles
A recessed LED profile is installed into a routed groove or prepared opening in a cabinet panel, wall, ceiling, or other suitable substrate.
Depending on the profile design, the upper edge may sit flush with the surrounding material, while a flange or lip covers part of the opening.
The main advantages are:
- A more integrated architectural appearance.
- Less protrusion above or below the mounting surface.
- The ability to conceal some cut edges when the profile geometry provides sufficient coverage.
- A consistent, defined line of light within the surrounding material.
However, recessed installation requires appropriate cutting tools, sufficient installation depth, and accurate preparation of the opening.
Explore LEDLINEA recessed LED profiles to compare different profile dimensions and designs.
Surface-mount LED profiles
A surface-mount LED profile is fixed directly onto the face of a cabinet, shelf, wall, ceiling, or other suitable surface.
The profile remains visible, although a slim design and a suitable finish can make it visually unobtrusive.
Its main advantages are:
- Little or no cutting into the substrate.
- Practical installation on existing finished surfaces.
- Greater flexibility for retrofit work.
- Potentially simpler removal, inspection, or repositioning, depending on the fixing method.
Surface mounting is not necessarily a less professional solution. In some commercial interiors, the visible profile is part of the intended design.
See the LEDLINEA surface-mount LED profile range for examples.
Where Recessed LED Profiles Are Commonly Specified
For a cleaner, more integrated finish
Recessed profiles are useful when the lighting line should appear to be part of the surrounding surface rather than an additional component attached to it.
Typical applications include custom cabinetry, display shelving, furniture, wall details, and architectural linear lighting.
A recessed installation can reduce the visible body of the profile, but it does not automatically eliminate every visible edge. The final appearance depends on the profile cross-section, the diffuser, the opening dimensions, and the quality of installation.
When the profile needs to finish an exposed cabinet edge
Custom cabinetry and millwork often require grooves to be cut into wood-based panels or other sheet materials.
A suitably designed recessed profile can cover part of the routed edge with its upper lip or flange. This can produce a cleaner transition between the lighting channel and the panel.
For example, a flanged recessed profile may be appropriate when the opening needs a defined border rather than a completely exposed cut edge.
However, the flange must be wide enough to cover the intended area. It cannot compensate for an incorrectly sized groove, inadequate support, or substantial surface irregularities. It should also not be treated as a substitute for moisture-resistant edge finishing where the substrate requires it.
See the 30.5 × 10 mm Flanged Recessed Profile AL009 as an example of a recessed profile with a flange.
When installing linear lighting in tiled surfaces
Tile installations require additional attention because cutting can leave exposed edges that are vulnerable to chipping or impact damage.
A suitably selected tile-compatible profile can create a defined edge and, where its cross-section provides appropriate overlap, help cover and physically shield part of the cut edge.
The result depends on the actual profile design and how it is incorporated into the tile assembly. A standard recessed profile should not automatically be assumed to provide the same function as a tile-specific profile or dedicated tile-edge trim.
For this reason, select the profile before finalizing the tile layout and cutting details. Check the tile thickness, groove dimensions, profile geometry, support, and any waterproofing requirements.
When the installation can be planned in advance
Recessed profiles are often easier to incorporate when cabinet panels, furniture, or architectural surfaces are still being manufactured or prepared.
The groove can be coordinated with the profile dimensions before assembly, reducing the need to modify a finished surface.
For a new project, confirm the profile dimensions and required opening before cutting. Do not assume that every recessed profile uses the same groove width, installation depth, or edge geometry.
Where Surface-Mount Profiles Are Commonly Specified
When the surface is already finished
Cutting a groove into an installed cabinet, painted wall, completed ceiling, or finished tile surface can create additional work.
Depending on the material, this may require careful cutting, dust control, patching, refinishing, or replacement of damaged sections.
A surface-mount profile avoids most of these substrate modifications and is often the more practical choice for retrofit lighting.
When installation access is limited
An existing structure may contain hidden fixings, wiring, hardware, or other obstructions.
Before cutting a groove, confirm that the substrate can safely accommodate the required opening. If the available depth is insufficient or the material should not be modified, surface mounting may be more suitable.
When visible hardware is acceptable
A surface-mount profile can create a clean linear lighting detail without requiring the body to be hidden.
The profile finish, width, height, and diffuser can be selected to suit the surrounding materials. In some applications, a visible aluminum line is an intentional design feature rather than a compromise.
Surface mounting can also simplify future access, although actual serviceability depends on how the profile is fixed and how the wiring is routed.
What About Gaps and Uneven Edges on Long LED Profile Runs?
This is an important detail when specifying longer lengths or multiple profiles in a continuous line.
A recessed profile does not automatically prevent gaps. Nor does a surface-mount profile inevitably leave gaps.
The outcome depends on several factors:
- Substrate flatness: An uneven mounting surface can prevent a profile from seating consistently.
- Groove accuracy: Variations in groove width, depth, or alignment can affect how a recessed profile sits.
- Profile alignment: Adjacent sections must be aligned carefully to avoid visible changes in the lighting line.
- Cutting accuracy: Poorly prepared ends can create noticeable joints between sections.
- Fixing method: The profile must be supported and fixed according to its intended installation method.
- Diffuser fit: Cover lengths and joints should be planned alongside the aluminum profile.
A flange may conceal minor irregularities along the edge of a suitable opening, provided the flange overlaps the affected area. It cannot reliably conceal a substantial void or correct a profile that is sitting unevenly.
For a long continuous run, check the actual installation length, plan the position of profile joints, and dry-fit the sections before final fixing where practical.
Do not rely on the diffuser to hide poorly aligned joints. Consistent profile alignment and correctly prepared ends are still essential to a clean finish.
For more practical guidance, see How to Cut LED Aluminum Profiles and Diffusers.
Recessed vs Plaster-In LED Profiles: Are They the Same?
No. Both installation methods can integrate lighting into a surface, but they are not interchangeable.
A standard recessed profile typically sits in a prepared opening. Depending on its design, part of the profile or its flange may remain visible.
A plaster-in profile is designed to be integrated into a suitable drywall or plaster finishing system. Its flanges and finishing details allow the surrounding surface to be finished around the profile to create a more seamless, trimless appearance.
Choosing the wrong profile can result in unnecessary finishing work or an unsuitable interface with the surrounding material.
If the specification requires the profile edges to disappear into the finished wall or ceiling, select a product designed for that finishing method rather than assuming any recessed profile will provide the same result.
See the LEDLINEA plaster-in profile range for this type of application.
What Should You Check Before Specifying an LED Profile?
Before finalizing the profile type, confirm the following details.
1. Substrate and surface condition
Identify whether the profile will be installed in wood, a cabinet panel, drywall, tile, or another material. Check whether the surface is finished and whether cutting or routing is appropriate.
2. Available width and depth
Compare the profile’s external dimensions with the available installation space. Confirm the required groove width and depth using the relevant product drawing.
3. Edge coverage and finishing
Where cut edges are visible, check whether the selected profile has a suitable lip or flange. Do not assume that every recessed profile can cover the same amount of material.
4. LED strip and diffuser compatibility
Confirm the internal channel width, available depth, strip dimensions, diffuser type, and any relevant thermal requirements. Mounting style alone does not determine light uniformity or brightness.
5. Total run length and joints
Check the actual installed length, profile section lengths, end clearances, and diffuser joints. Allow for the fitting and movement requirements specified for the selected components.
6. Maintenance and installation access
Consider how the diffuser will be removed, how the LED strip can be serviced, and how wiring can be accessed. A clean initial finish should not come at the expense of a difficult maintenance procedure.
7. Environmental conditions
For tiled, wet, or outdoor installations, confirm the complete assembly’s suitability for the environment. A recessed profile by itself does not make an installation waterproof.
Frequently Asked Questions
Is a recessed LED profile better than a surface-mount profile?
Not in every situation. Recessed profiles are useful when a flush appearance or integrated edge detail is important. Surface-mount profiles are often preferable when the surface is already finished or modifications should be minimized.
Can a recessed LED profile cover a chipped tile edge?
A suitable tile-compatible profile may cover and protect part of a cut edge, depending on its geometry and installation. It cannot be assumed to repair a damaged tile or eliminate the need for correct cutting, adequate support, and suitable waterproofing.
Do recessed LED profiles prevent gaps?
No. A suitable flange can conceal some minor edge irregularities, but gaps may still occur because of an uneven substrate, an inaccurate opening, poor alignment, or incorrectly prepared joints.
Are recessed and plaster-in LED profiles interchangeable?
No. Standard recessed profiles fit into prepared openings, while plaster-in profiles are designed to integrate with the surrounding finishing material. Always select the installation type intended for the project.
Can surface-mount LED profiles be used in new construction?
Yes. Surface-mounted profiles can be selected for new projects when a visible channel is acceptable, installation flexibility is useful, or the design does not require a flush finish.
Conclusion: Matching the Profile to the Installation Requirements
Recessed and surface-mount LED profiles solve different installation problems.
Choose recessed installation when the project requires an integrated lighting line, a carefully finished panel opening, or a suitable profile detail within a tiled surface. Choose surface mounting when you need to work with an existing finished surface, minimize cutting, or retain practical access.
The best choice is not determined by appearance alone. Substrate condition, groove tolerances, profile geometry, run length, diffuser fit, and future maintenance all contribute to the final result.
For project-specific applications, confirm the substrate, available installation depth, required profile length, LED strip dimensions, and edge-finishing requirements before finalizing the specification. Refer to the relevant technical drawings and coordinate the selected profile with the requirements of the installation.